1. SAFETY FIRST
Make sure to disconnect your battery before working on your vehicle’s electrical systems.

2. INSTALL THE WIRING HARNESS
Put the wiring harness in the engine bay and approximate where you want the wiring to point.
3. DECIDE WHERE YOU WANT THE LIGHT BAR
Use double-sided tape to mount the light bar to ensure you like the way that it looks. You also want to check to make sure that it is centered before drilling anything.
4. DRILL YOUR HOLES
After drilling, all you need to do is put the bolts in and make sure that everything is properly connected. Take the negative and positive wires and connect them to the light bar, then pass it through the firewall and connect to the on/off switch.
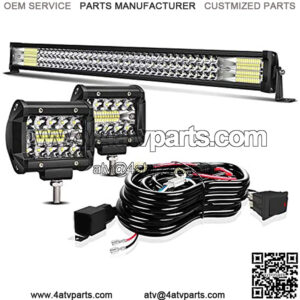
5. WIRE UP THE LIGHT BAR
Take the positive wire and connect to the battery. Meanwhile, find a ground for the negative wire.
6. CHECK YOUR WORK
Reconnect your battery, then go ahead and test out the light bar.
After this, you’re ready to flip a switch and shine on.
About light bar
“light bar vapor cup”
“light bar vape cup”
“black light district bar”
“croc light bar”
“light bar vape”
“whelen light bar”
“kc hilites light bar”
“bar light fixture”
“rigid light bar”