With this procedure, you bleed the master cylinder when it is still attached to the ATV.
Tools required:
To perform this job, you need almost no tools. All you need is:
- A screwdriver or hex wrench to open the brake fluid reservoir lid.
- A wrench that fits the banjo bolt.
- Brake-fluid according to manufacturer specs. The quality should be listed on the brake fluid reservoir lid or in your manual. Dot 4 is common on ATVs.
- A few rags to prevent spilling brake fluid on the plastic or paint on your bike, as this will create permanent damage.
- Latex gloves. Brake fluid is corrosive and may damage your skin.

This is how you do it:
- Open the brake fluid reservoir lid and diaphragm. Be careful; the bolts strip easily.
- Pour new brake fluid into the reservoir so that it’s at the maximum level mark.
- Place plenty of rags to soak up the brake fluid being bled.
- Pull back the rubber cap covering the banjo bolt.
- Open the banjo bolt using the wrench. Remove the bolt from the cylinder.
- Use your finger to cover the hole where the banjo bolt was sitting. Remember to wear gloves.
- Use your finger as a “valve” to let brake fluid out, but prevent air from getting back in when you pump the brakes.
- Start pumping the brake gently. Slightly release the pressure with your finger covering the hole to allow fluid to escape. Keep pressing the lever until you reach about 80% of its total travel.
- When at about 80% of total travel and all the time when releasing the lever to do another pump, you should keep your finger firmly covering the hole. You must do your best not to let any air back into the hole at this stage.
- Continue this process for a few pumps. Add more fluid before it runs low.
- Repeat until there is no more air coming out with the brake fluid. You should be able to feel when this happens with your finger. It’s also quite visible when the bubbles are no longer coming—the stream of fluid changes from sputtering to a solid stream. Keep the finger pressed firmly against the opening when you are done.
- Grab the banjo bolt with your free hand, and get ready to thread it in the hole as effectively as you can.
- Remove the finger and thread the bolt all the way.
- Tighten according to factory spec; it should be snug.
- Top off the reservoir and reinstall the reservoir cover.
- Bleed the brakes as normal to remove the last bit of air. Either use the manual pump and release method or use a vacuum bleeder. Reverse bleeding is not recommended at this point as this will only press the small amount of air that’s left back into the master cylinder.
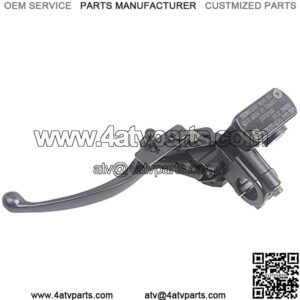
About ATV Master Cylinder
“atv master cylinder won’t build pressure”
“atv master cylinder rebuild”
“atv master cylinder”
“atv master cylinder bleeding”
“atv master cylinder rebuild kit”
“atv master cylinder problems”